You can download a Source Sample (1.5GB) (by courtesy of Stijn Van Velthoven, www.thehomepilot.com) and the stitched video (962MB) done using StereoStitch.
Prerequisite:
Hugin or PTGui.
The StereoStitch workflow consists of the following steps:
1- Load the Videos.2- Synchronize Audio.
3- Generate calibration file.
4- Load the calibration file.
5- Generate the result.
The most important step is the 3rd step where you should be very careful and precise in generating the template to get a perfect stitched video at the end.
1-Load the Videos:
Before loading the videos you want to stitch, make sure all of them are in the same folder. Otherwise move them in a common folder.Open StereoStitch. You should see this interface:
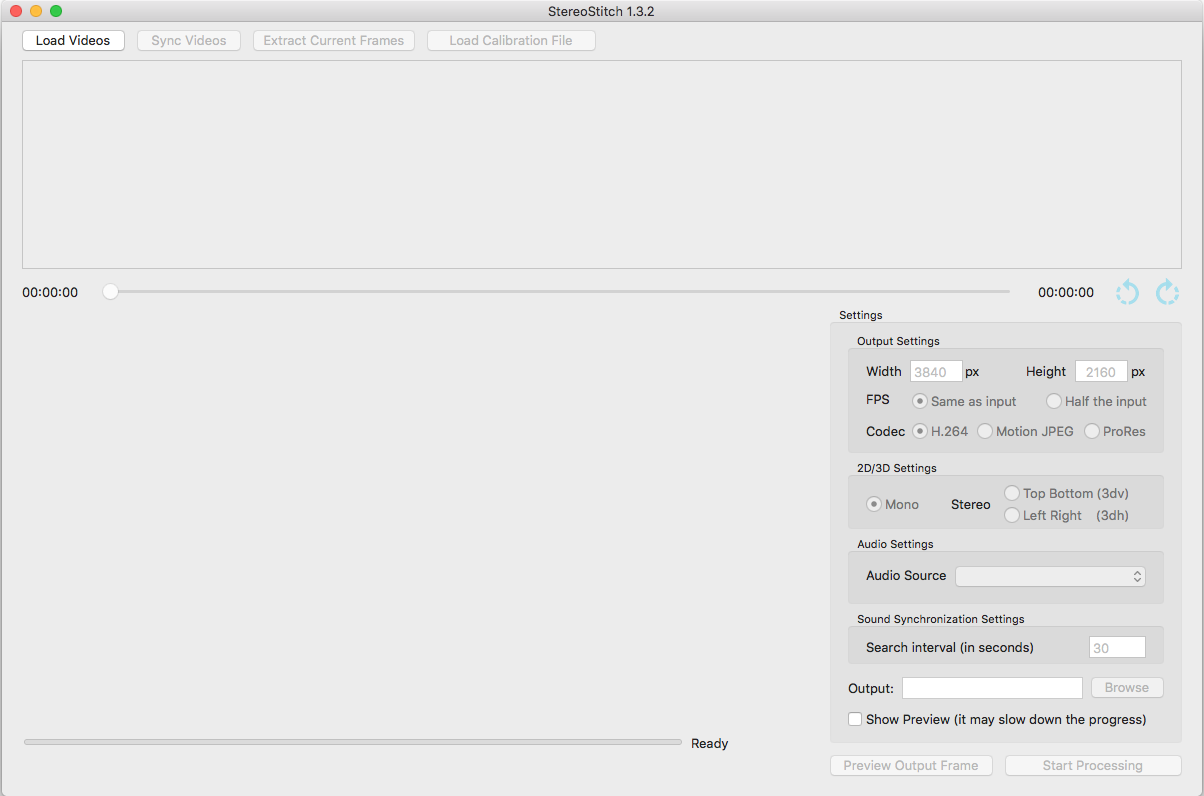
Click on the Load Videos button located on the top left corner of the interface, and select the 2 or more videos you want to stitch.
After loading the videos, the button Load Videos will be disabled. All other buttons on its right should be enabled. You will also notice a frame of each video loaded in the top part of the interface.
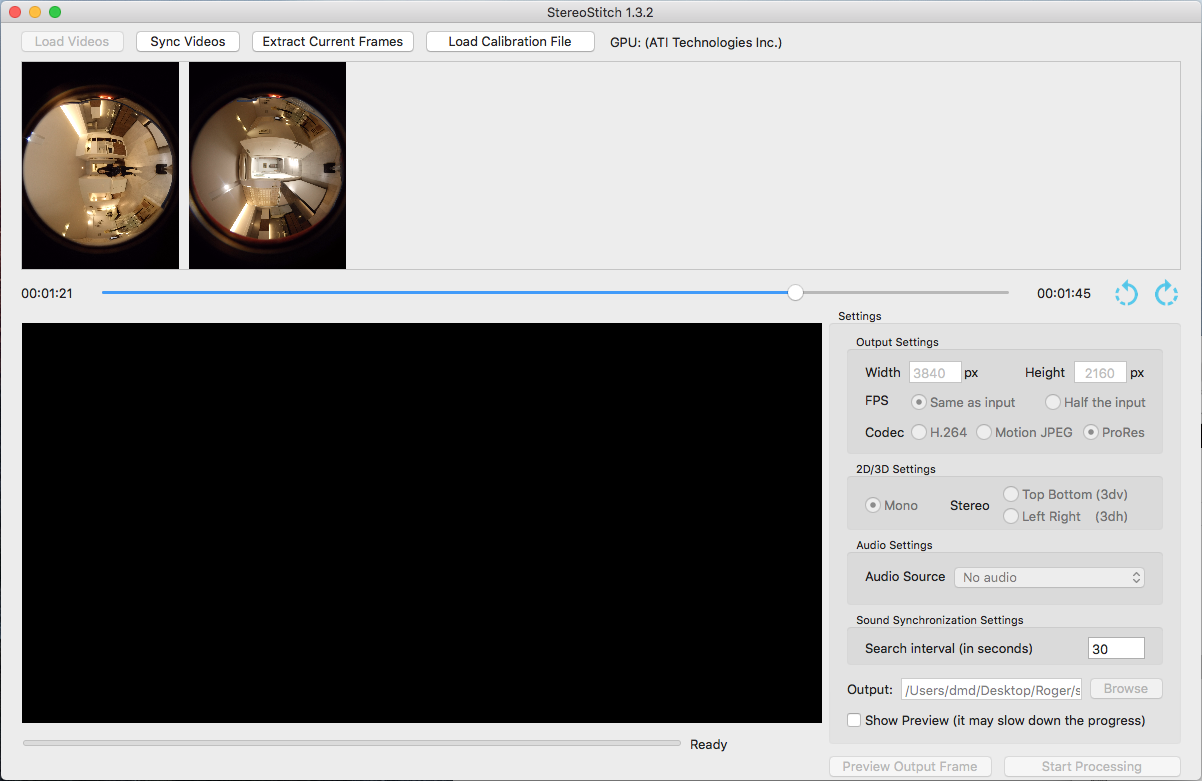
You can, if you wish, rotate the frames displayed, by pressing the two rotate buttons:

The result will not be affected by this rotation.
2- Synchronize Audio:
This operation uses the audio band of each video to synchronize the videos.
By default the first 30 second of each audio band is used. You can always change the number of seconds used by changing the Search interval value in the bottom right part of the interface containing all the settings.
Note: Audio synchronization works better with an identified loud sound pattern (i.e. clap) within the margin you specified in the Search interval.
When ready, click on the Sync Videos button to synchronize the source videos and wait for the message that indicates the completion.
3- Generate calibration file:
In this step we will generate the calibration file used to stitch your videos. For that we will need image from each video and PTGui or Hugin.
First, using the seek bar, change the time at which you want to extract the frames you will use for calibration.
Note: The best images for calibration are the ones containing no object close to the camera. Images showing far away objects will help generate better calibration file, improving the result.
When satisfied with the time, click on the Extract Current Frames button. This will extract one frame from each video.
A popup window will show the folder containing the extracted frames. Copy them in another folder for easy access.
It is the time for the most important step: generating the calibration file using the extracted frames.
To generate the calibration file, you can use Hugin, In this tutorial however, we will use PTGui.
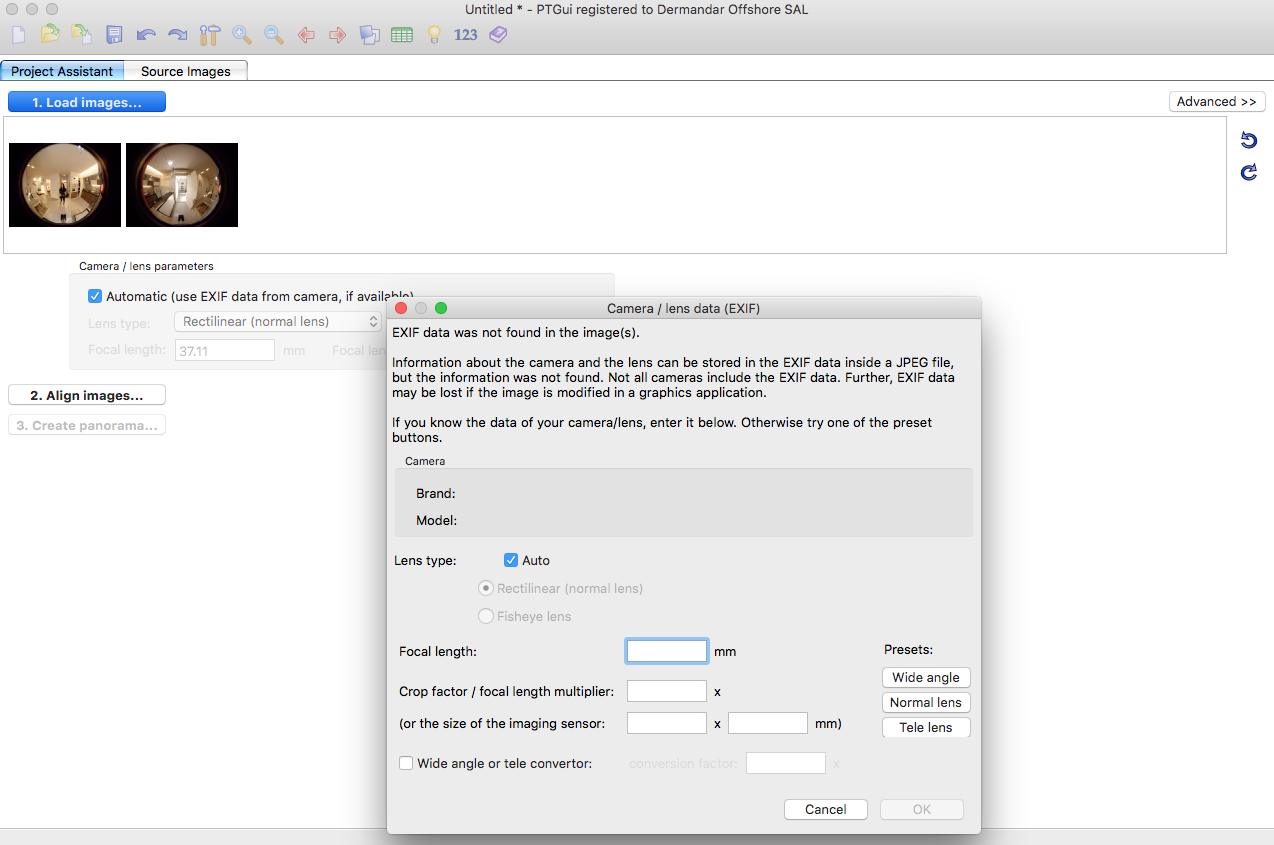
Open PTGui, click on the Load images button and choose the frames extracted from the videos and click Open.
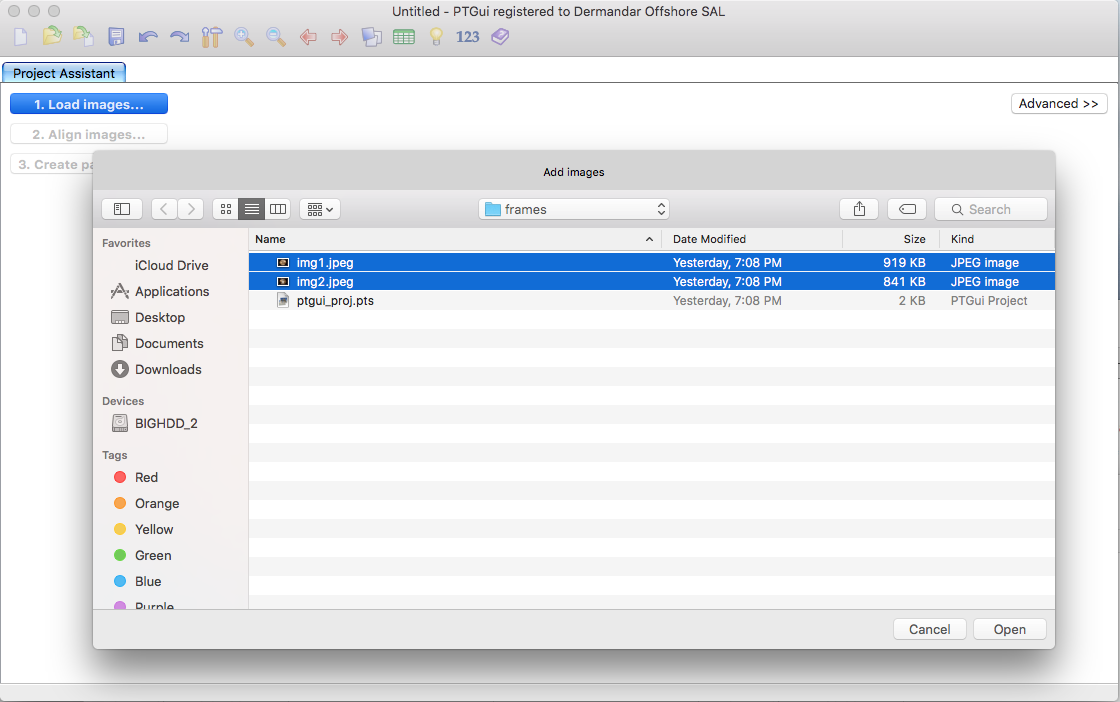
Loading the images will open the Camera / lens data window, you can cancel it.
In the Project assistant tab choose the lens type: Circular Fisheye and fill the fov (field of view) value of your lens (230 in our example).
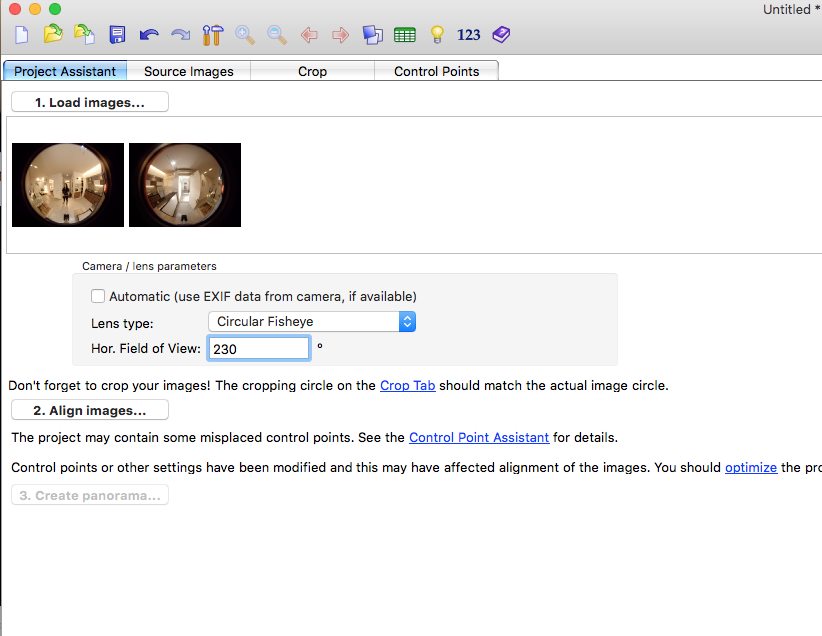
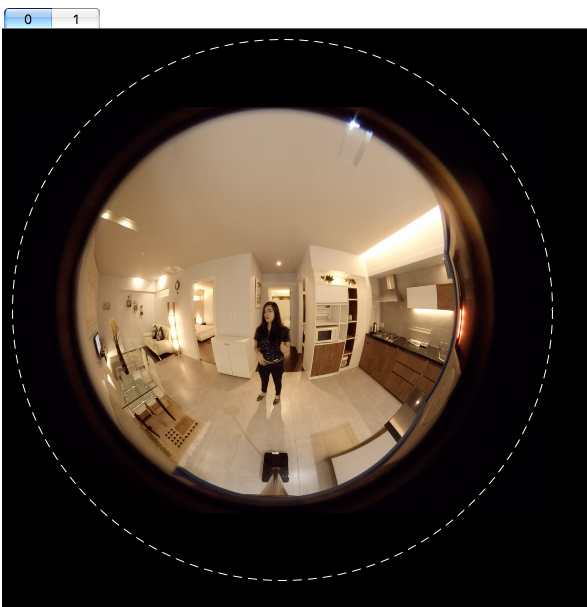
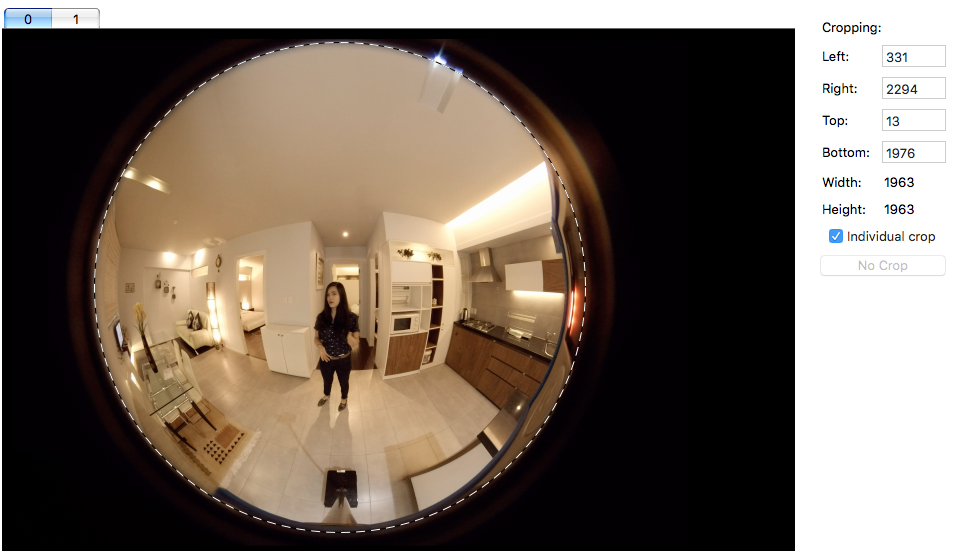
In the top right, click the Advanced button to toggle form simple to advanced mode. Go to the crop tab to fix the crop of the images.
By default, PTGui use 1 crop for all the image. Check the individual crop check box on the right in case you want to crop each image separately.

After that go back to the Project Assistant tab and press Align images, you will get the first result.
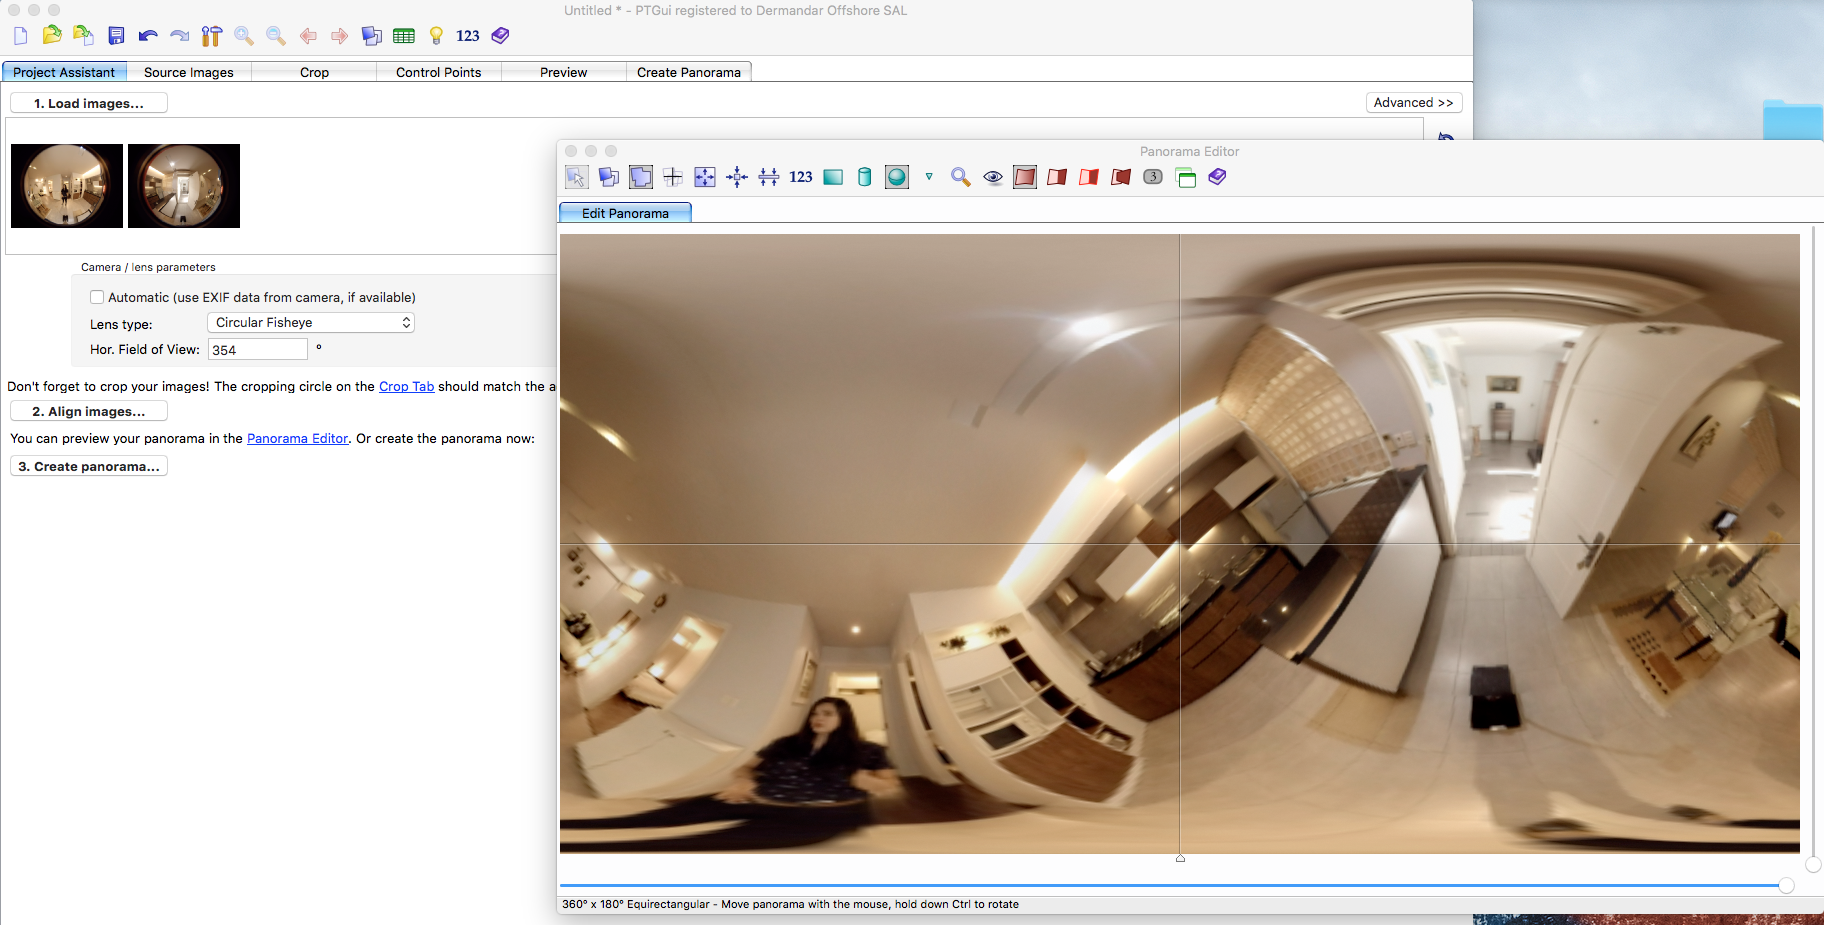
If the horizon alignment is not correct, you can fix it by mouse: Click on the image in the panorama editor and drag up, down, right and left. Right clicking allow you to change the current rotation.
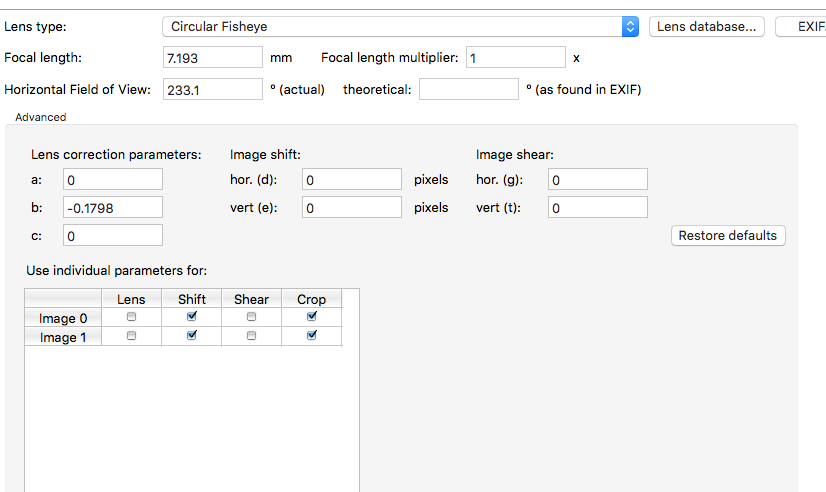
Go to the Lens Settings tab and in the individual parameter table, check the: Lens, shift and crop columns (shear is not supported in StereoStitch), if by checking the lens column, the result is worse, you can uncheck it as in our sample.
Go to the optimizer tab, press advanced and check the yaw, pitch and roll.
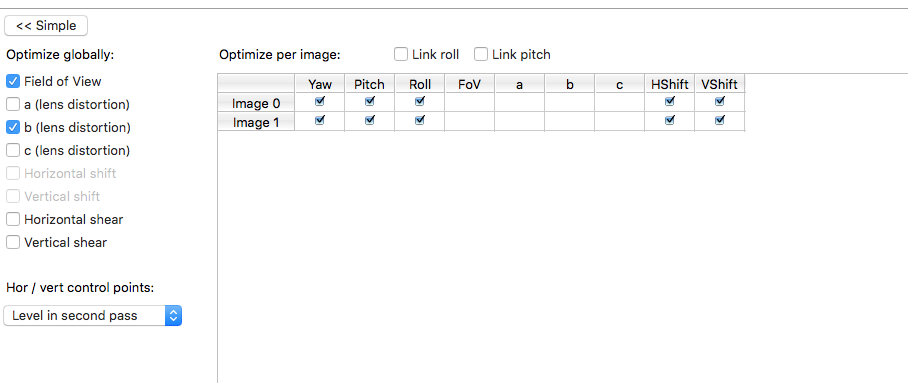
then press run optimizer.
You can anytime press the panorama editor button in the top  to view the result or in the preview tab you can choose higher resolution for better display.
- To correct stitching errors and have better results you have to go to the Control Points tab.
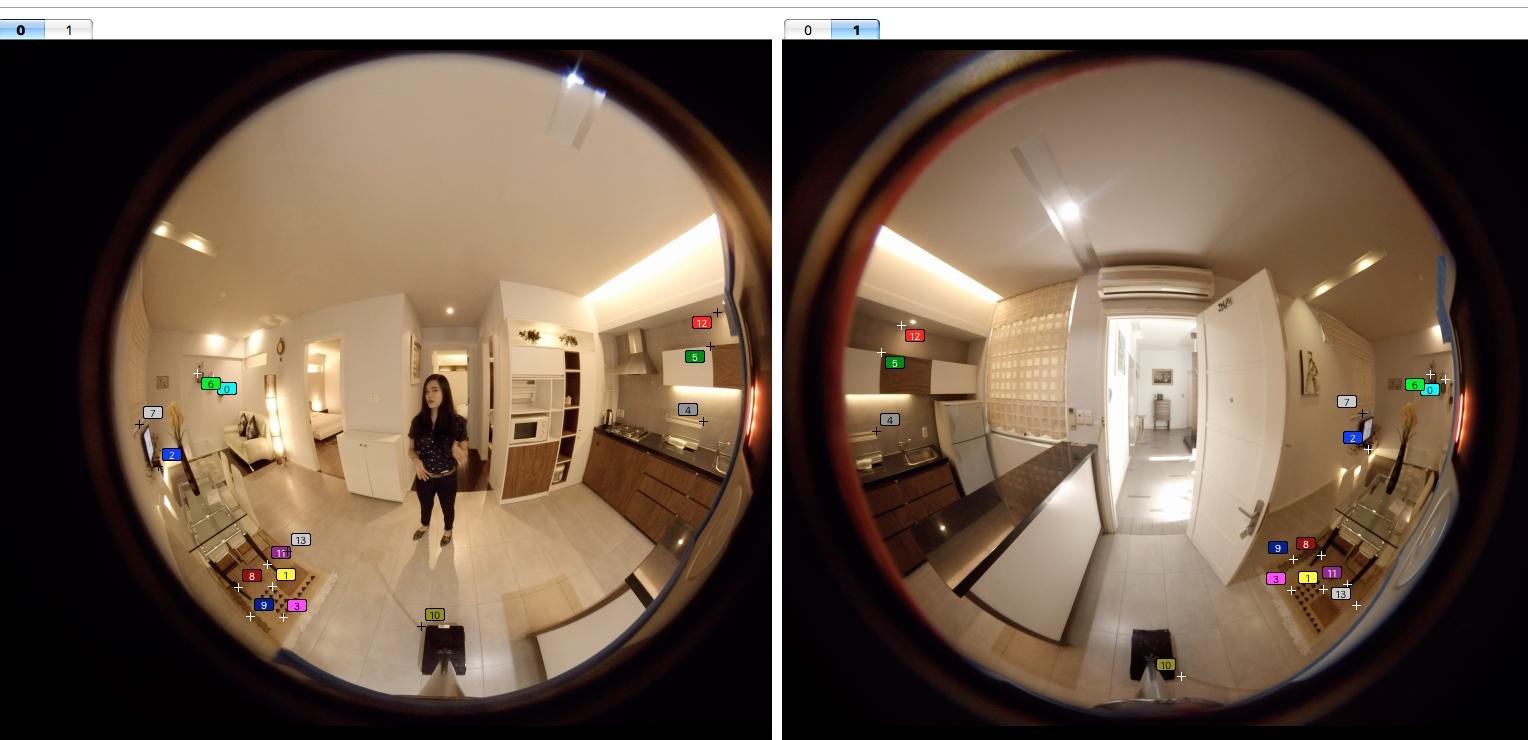
For a better result:
a- Delete the nearby control points (to select more than one control point, hold the shift key, click the left mouse key and drag over the control points).
b- Add more control points to the far objects and especially where there is error in the stitching.
Note: If you want to generate more control points in a certain area, you can select this area while holding shift. Then right click on your selection and choose add control points here.

To apply changes, press Run optimizer in the Optimizer tab, you can check the parameter b (lens distortion) and press run optimizer and see if the result is better, if it is not undo the checked box and if it is better and needs more optimization and you are sure about the control points, try the parameters a (lens distortion) and b (lens distortion) and check if it corrected the errors. (in our example we checked just the parameter b).
Note: it is advised to click Run optimizer after any change you do, to check if the result got improved, and to decide whether the last change should be kept or not.
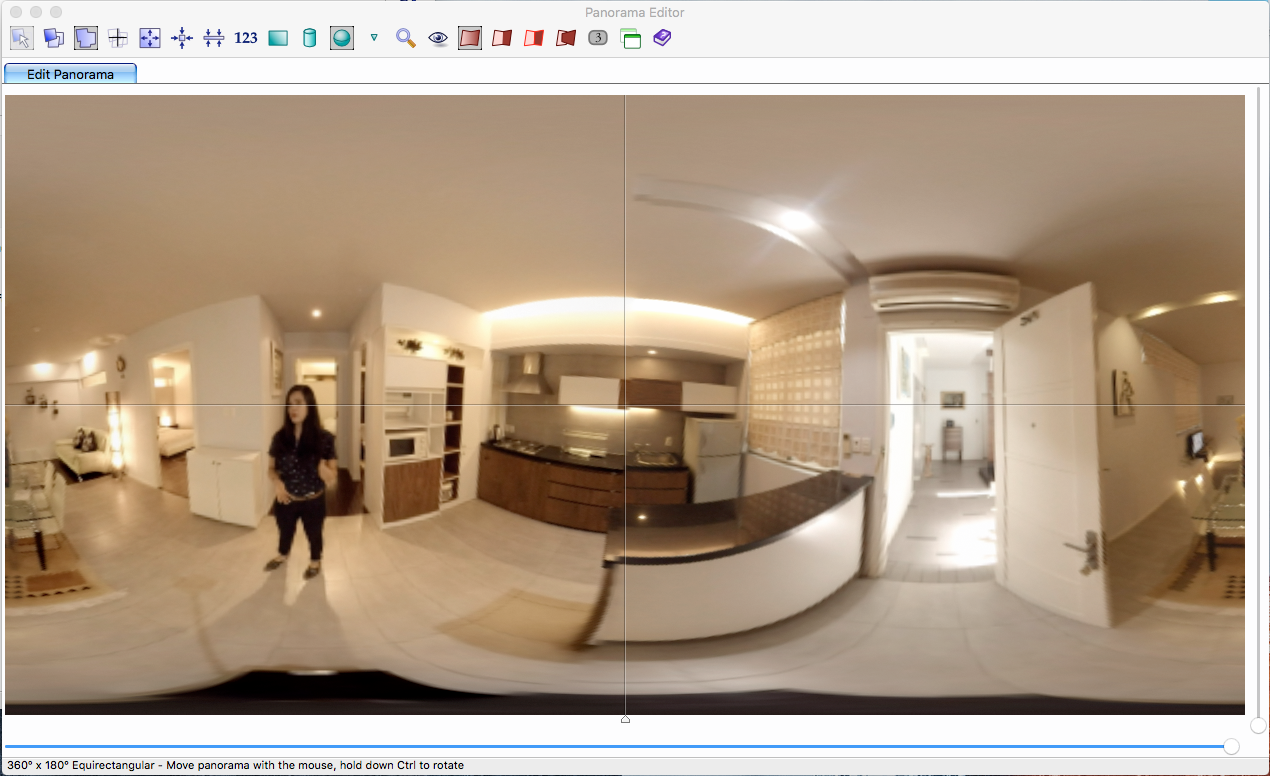
If you did the steps well, the result of the stitching should be similar to this:

finally, save the file as template. It will be your calibration file.
4- Load the calibration file:
Back to StereoStitch, press Load Calibration File and choose the saved calibration file you generated from PTGui (or Hugin).
5- Generate the result:
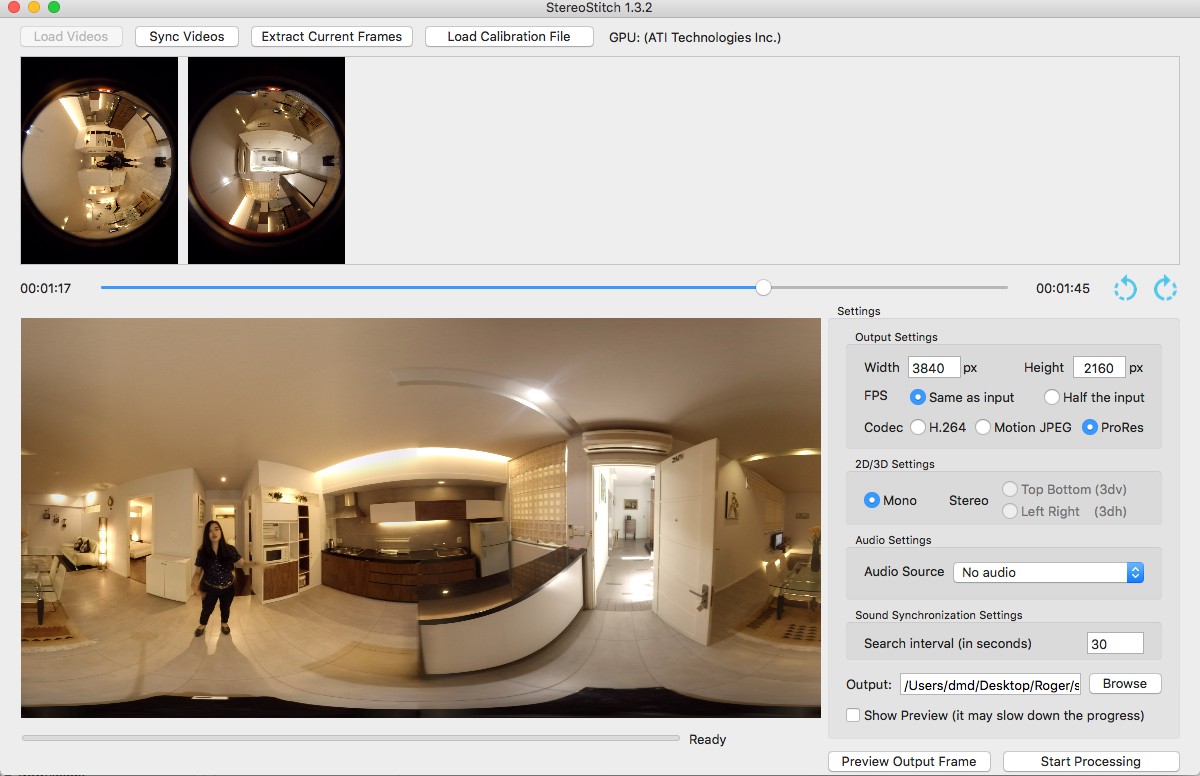
On the bottom right, you will have a list of parameters you can change. Choose the size and the format you want for the resulting video, include (choose any of the audio source) or not the audio and click on Start Processing to generate the result.
While processing you can choose to see a preview of the result as it is being stitched by checking the Show Preview check box. Please note that doing so will slow down the process.